What Type of Weld Is Suitable for Aluminum Bracket?
Selecting the correct weld type for aluminum bracket welding is a foundational decision that directly impacts joint strength, distortion control, and production efficiency. Aluminum brackets come in various geometries—flat plates, angled profiles, channel sections, and complex extrusions—each demanding tailored weld joint designs.
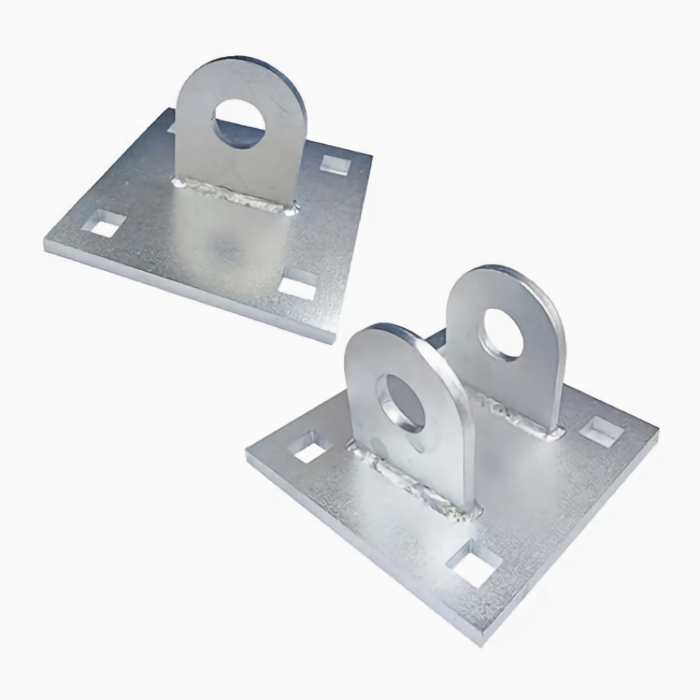
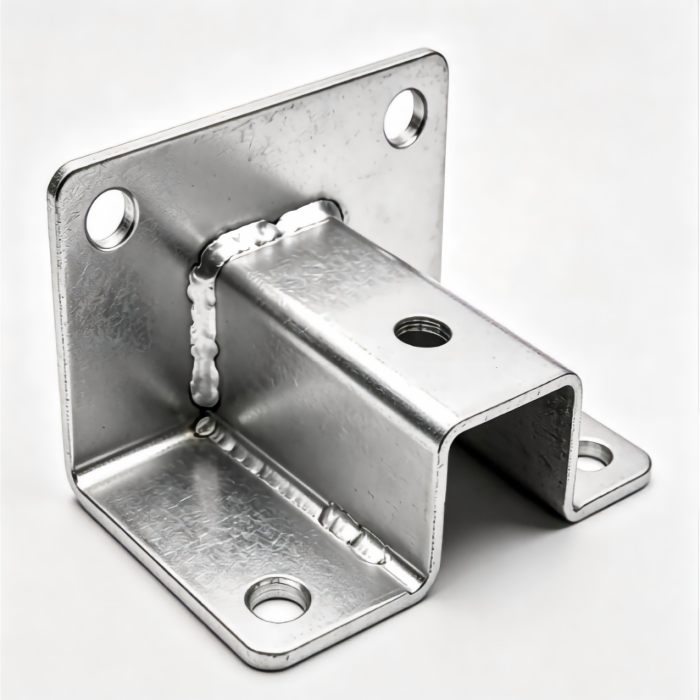
Fillet welds are the most common and suitable choice for aluminum bracket welding, particularly for T-joints and lap joints where two bracket components meet at right angles. Fillet welds distribute stress across a broader area, reducing the risk of cracking in aluminum’s heat-affected zone. For brackets of moderate thickness (3 mm to 10 mm), a continuous fillet weld provides excellent structural integrity.
Groove welds (butt welds) are ideal when joining two aluminum bracket pieces end-to-end to create a longer continuous section. For thinner aluminum brackets (under 3 mm), a square groove butt weld with tight fit-up works effectively. For thicker sections, a V-groove or bevel-groove preparation ensures complete penetration and full joint strength. Backing bars—preferably made of copper or stainless steel—are highly recommended during aluminum bracket welding to support the weld pool and prevent burn-through.
Plug welds and slot welds are occasionally used in aluminum bracket welding when joining overlapping sections where access is limited to one side. These are common in enclosed bracket assemblies or automotive mounting brackets where spot welding is impractical.
Intermittent welds (stitch welds) are particularly suitable for long aluminum bracket seams where full continuous welding would cause excessive distortion. By welding 25 mm to 50 mm segments with gaps of equal length, heat input is reduced, and the bracket maintains its dimensional stability.
Ultimately, the most suitable weld for your aluminum bracket depends on material thickness, joint configuration, load requirements, and aesthetic standards. For most general-purpose aluminum brackets, fillet welds on T-joints and butt welds on end-to-end connections, executed with appropriate heat control, represent the most reliable choices.
Is TIG or MIG Welding Better for Aluminum Bracket?
This is perhaps the most frequently asked question in aluminum bracket welding, and the answer depends on your production volume, bracket thickness, quality requirements, and operator skill level.
TIG welding (Gas Tungsten Arc Welding – GTAW) is widely regarded as the superior choice for high-quality aluminum bracket welding, especially for thinner sections, cosmetic applications, and complex geometries. The primary advantages of TIG for aluminum brackets include:
- Exceptional control over heat input and filler metal addition, crucial for preventing burn-through on thin-walled aluminum brackets.
- Clean, spatter-free welds that require minimal post-weld cleanup—important for brackets that will be anodized or powder-coated.
- Ability to weld aluminum alloys with high magnesium or silicon content that are sensitive to contamination.
- Suitability for out-of-position welding, such as vertical or overhead bracket installations.
However, TIG is slower, has lower deposition rates, and demands a higher skill level. For complex aluminum bracket welding with multiple short welds, TIG remains the gold standard despite its slower speed.
MIG welding (Gas Metal Arc Welding – GMAW) , particularly with pulsed spray transfer, is often the better choice for higher-volume aluminum bracket production. Advantages of MIG include:
- Higher deposition rates—MIG can deposit filler metal 3 to 5 times faster than TIG, making it cost-effective for large bracket runs.
- Easier to learn—MIG requires less operator dexterity than TIG, allowing less experienced welders to produce acceptable results.
- Pulsed MIG technology has dramatically improved aluminum welding performance, reducing spatter and allowing for thinner material welding.
The downsides of MIG for aluminum bracket welding include more spatter, the need for specialized push-pull wire feeders (aluminum wire is soft and prone to bird-nesting), and slightly less precise heat control compared to TIG.
The verdict: For thin aluminum brackets (under 3 mm), intricate designs, and visible applications where weld appearance matters, TIG is unequivocally better. For thicker brackets (over 5 mm), high-volume production, and applications where speed is prioritized over perfect aesthetics, MIG is often the more economical and efficient choice. Many professional fabricators employ both processes: TIG for prototyping, repair, and high-end finishes, and MIG for production runs.
What’s the Most Effective Way to Weld Aluminum Bracket?
Effectiveness in aluminum bracket welding is a combination of proper preparation, technique, and process control. The most effective method addresses aluminum’s unique properties: its high thermal conductivity (which pulls heat away from the weld zone), its tenacious aluminum oxide layer (which melts at 2,000°C vs. 660°C for the base metal), and its tendency to warp under concentrated heat.
Step 1: Thorough Cleaning – The Non-Negotiable Foundation
The most effective aluminum bracket welding begins with rigorous cleaning. Remove all oils, greases, cutting fluids, and machining residues using a degreaser or acetone. Then, remove the aluminum oxide layer using a stainless-steel wire brush dedicated exclusively to aluminum—never use a brush previously used on steel, as steel particles embed in the aluminum and cause contamination. For heavily oxidized brackets, chemical etching or mechanical abrasion with fine-grit sandpaper (120–220 grit) is recommended. Cleaning should be performed immediately before welding, as aluminum oxide begins reforming within hours.
Step 2: Proper Joint Fit-Up and Fixturing
Aluminum bracket welding demands tight joint fit-up. Gaps should not exceed 1.5 mm for most applications. Use robust clamping and fixturing to hold the bracket components rigidly during welding. Aluminum expands about twice as much as steel when heated, so clamping must allow for some movement while maintaining alignment. Copper backup bars placed behind the joint act as effective heat sinks, drawing excess heat away and preventing melt-through.
Step 3: Heat Management – The Key to Distortion-Free Welding
The single most effective technique for aluminum bracket welding is managing heat input through:
- Precalentamiento: For brackets thicker than 6 mm, preheating to 150°C–200°C (300°F–400°F) reduces the temperature gradient and helps prevent cracking. However, avoid overheating aluminum above 250°C, which can cause grain growth and loss of mechanical properties.
- Interpass temperature control: Maintain interpass temperatures below 150°C for most aluminum alloys to prevent excessive softening.
- Intermittent welding: Use a skip-welding or back-stepping pattern—weld short segments, then move to a distant area to allow cooling. This distributes heat evenly and minimizes distortion.
Step 4: Correct Filler Metal Selection
Using the right filler metal is essential for effective aluminum bracket welding. Common choices include:
- ER4043: Suitable for most 6xxx series brackets, offers good fluidity and crack resistance.
- ER5356: Provides higher shear strength and better corrosion resistance, ideal for marine or structural brackets.
- ER4943: A newer option that combines the crack resistance of 4043 with the strength of 5356.
Always match the filler to the base alloy and service conditions of the bracket.
Step 5: Proper Gas Shielding
Use 100% argon for TIG and argon/helium mixtures (or pure argon for thinner sections) for MIG. Gas flow rates should be 15–25 CFH (cubic feet per hour), with higher flows for windy environments. Inadequate shielding results in porosity—the most common defect in aluminum bracket welding.
Paso 6: Tratamiento Posterior a la Soldadura
After completing aluminum bracket welding, allow the bracket to cool naturally. For critical applications, post-weld heat treatment (aging) may restore mechanical properties lost during welding. Light peening (gentle hammering) can relieve residual stresses. Finally, remove any discoloration or oxide layer with a stainless-steel brush or acid pickling if the bracket will be anodized or painted.
By following this systematic approach—cleaning, fit-up, heat management, filler selection, shielding, and post-treatment—you can achieve consistently effective aluminum bracket welding results with minimal defects and distortion.
What Type of Welder Do You Need for Aluminum Bracket?
Selecting the right welding machine for aluminum bracket welding is a strategic investment that significantly affects quality, productivity, and operational costs. Aluminum has specific equipment requirements that differ from steel welding.
Para Soldadura TIG:
You need a TIG welder with AC (Alternating Current) capability—this is non-negotiable for aluminum bracket welding. AC welding alternates between electrode positive (cleaning action) and electrode negative (penetration), breaking up the aluminum oxide layer during each cycle. Key features to look for:
- High-frequency start to avoid tungsten contamination from contact starting.
- Pulse capability to reduce heat input on thin brackets.
- Independent amperage control for cleaning and penetration balance (often called AC balance control).
- Foot pedal or remote amperage control for real-time heat adjustment during welding.
- Power output: 150–250 amps is sufficient for most aluminum brackets up to 6 mm thick. For thicker brackets, consider a 300-amp machine.
TIG torches for aluminum should be water-cooled for prolonged welding sessions, though air-cooled torches are adequate for intermittent work. Use 2% lanthanated or ceriated tungsten (color-coded gold or gray) for the best arc stability on aluminum.
Para soldadura MIG:
Aluminum MIG welding requires specific equipment that differs significantly from steel MIG setups:
- Spool gun or push-pull wire feeder: Aluminum wire is soft and easily tangled. A spool gun mounts the wire spool directly on the gun, minimizing feed issues. A push-pull system uses a motor in the gun to pull the wire while the main feeder pushes, ensuring consistent feed.
- Pulse capability: Pulsed MIG (Pulse-MIG or P-GMAW) is highly recommended for aluminum bracket welding as it reduces spatter, improves arc stability, and allows welding of thinner materials.
- Teflon or U-groove drive rolls: Standard V-groove rolls crush aluminum wire—use U-groove or Teflon rolls designed specifically for soft metals.
- Power output: A 200–300 amp MIG machine is suitable for most aluminum bracket applications. For production welding of thick brackets, 350+ amps may be required.
Soldadores multiproceso:
A multi-process machine that offers both AC TIG and pulse MIG capabilities is an excellent investment for fabricators handling diverse aluminum bracket welding jobs. Brands like Miller, Lincoln Electric, and ESAB offer robust multi-process units suitable for professional use.
Auxiliary Equipment:
- Gas regulator and flowmeter: Essential for precise argon flow control.
- Dedicated aluminum wire brush: Never use on steel.
- Clamps and fixtures: Heavy-duty C-clamps, magnetic clamps, and custom jigs are critical for maintaining bracket alignment.
- Helmet with auto-darkening: A clear view of the weld pool is crucial for aluminum bracket welding.
In summary, for aluminum bracket welding, you need an AC/DC TIG welder with pulse (150–250A) or a MIG welder with spool gun/push-pull feeder and pulse capability (200–300A) . For the greatest versatility, a multi-process machine combining both functions is the ultimate solution.
¿Cuáles son los 7 tipos básicos de soldadura?
Understanding the seven fundamental welding processes provides context for why specific methods are chosen for aluminum bracket welding. Here are the seven basic types as recognized by the American Welding Society (AWS):
1. Shielded Metal Arc Welding (SMAW) – Stick Welding
This is the most traditional arc welding process, using a consumable electrode coated with flux. The flux decomposes to generate shielding gas and slag. While SMAW is versatile for steel and other materials, it is completely unsuitable for aluminum bracket welding because aluminum’s oxide layer cannot be adequately cleaned by the flux, and the resulting weld quality is poor. Stick welding aluminum is rarely practiced.
2. Gas Metal Arc Welding (GMAW) – MIG Welding
As detailed above, MIG is a major process for aluminum bracket welding, using a continuously fed solid wire and external gas shielding. Short-circuit, spray, and pulsed spray transfer modes are used depending on bracket thickness. Pulsed MIG is particularly effective for aluminum brackets.
3. Gas Tungsten Arc Welding (GTAW) – TIG Welding
TIG is the premier process for high-quality aluminum bracket welding, using a non-consumable tungsten electrode and separate filler rod. AC current is mandatory for aluminum to provide oxide cleaning action. TIG offers unmatched precision and is the go-to for thin, cosmetic, or complex brackets.
4. Flux-Cored Arc Welding (FCAW)
Similar to MIG but using a tubular wire filled with flux. FCAW is highly productive for steel but is rarely used for aluminum because flux-cored aluminum wires are not widely available or reliable, and the slag cleanup is problematic for brackets.
5. Submerged Arc Welding (SAW)
In SAW, the arc is submerged under a blanket of granular flux. This is a high-deposition, mechanized process used for thick, straight seams—common in pipe and heavy plate manufacturing. SAW is not suitable for aluminum bracket welding due to the massive heat input, lack of manual control, and difficulty in handling aluminum’s thermal behavior.
6. Resistance Welding (RW)
Resistance welding includes spot welding, seam welding, and projection welding, using electrical current and pressure to join metals without an arc. Resistance spot welding is actually used for some aluminum brackets, particularly in automotive assemblies where multiple brackets are spot-welded to body panels. However, it requires specialized high-current equipment and is limited to overlapping joints.
7. Laser Beam Welding (LBW) and Electron Beam Welding (EBW)
These high-energy-density processes use focused beams to melt metal with minimal heat-affected zones. Laser welding is increasingly used for precision aluminum bracket welding in aerospace, medical, and electronics industries. However, equipment is expensive and typically automated, making it less accessible for general fabrication.
Relevance to Aluminum Bracket Welding:
Among these seven, TIG (GTAW) and MIG (GMAW) are the two most relevant and widely used processes for aluminum bracket welding. Resistance welding (spot welding) is also applicable in specific high-volume automotive contexts. The other four processes (SMAW, FCAW, SAW, LBW/EBW) are either unsuitable, impractical, or too specialized for routine aluminum bracket fabrication.
Practical Tips for Successful Aluminum Bracket Welding:
To conclude this comprehensive guide, here are actionable tips to enhance your aluminum bracket welding outcomes:
- Store aluminum brackets properly: Keep them in a dry, clean area to prevent moisture absorption and oxide buildup. Wet aluminum introduces hydrogen into the weld pool, causing porosity.
- Use the correct tungsten geometry: For AC TIG on aluminum, use a pointed or truncated tip—balling is not required on modern inverters. A 2% lanthanated tungsten with a 30°–60° point angle works well.
- Push technique for MIG: Always use the “push” (forehand) technique with a 10°–15° drag angle when MIG welding aluminum. This improves gas coverage and reduces spatter.
- Watch the weld pool, not the arc: In TIG welding, focus your attention on the molten pool and the filler rod’s dipping rhythm. This builds the muscle memory needed for consistent aluminum bracket welding.
- Increase travel speed: Aluminum conducts heat rapidly—moving too slowly causes excessive melt-through and sagging. Maintain a brisk travel speed while keeping the arc tight (3–5 mm arc length).
- Use backing plates: Copper or aluminum backing bars support the weld root, prevent burn-through, and act as heat sinks. They are invaluable for thin-walled aluminum brackets.
- Perform a bend test: Before full production, weld a test coupon and bend it to confirm the weld is sound. This simple destructive test can reveal fusion defects or porosity early.
- Keep a log: Record your amperage, travel speed, gas flow, and filler wire type for each bracket thickness and alloy. This builds a reference database for future jobs.
- Consider robotic welding: For high-volume aluminum bracket welding, robotic MIG or TIG systems offer consistency, speed, and repeatability that manual welding cannot match.
Conclusión:
Aluminum bracket welding is a specialized discipline that demands an understanding of aluminum’s unique material properties, appropriate equipment selection, and disciplined technique execution. By choosing the right weld type—whether fillet, butt, or intermittent—and deciding between TIG and MIG based on your specific thickness, quality, and production requirements, you can achieve strong, durable, and aesthetically pleasing aluminum brackets.
The most effective welding approach combines meticulous cleaning, tight fit-up, intelligent heat management, correct filler metal, and proper shielding gas. Equipment choices range from AC TIG welders with pulse functionality to MIG systems with push-pull feeders and pulse capability, with multi-process machines offering the ultimate flexibility. While the seven basic welding types offer a broad spectrum of options, TIG and MIG remain the undisputed workhorses for aluminum bracket fabrication. Armed with the knowledge and practical tips provided in this guide, you are well-prepared to tackle any aluminum bracket welding project with confidence, precision, and professional-grade results.