Porosidad en soldadura de aluminio no es solo un pequeño defecto visual en un cordón. En piezas personalizadas, puede aparecer durante pruebas de fugas, recubrimiento, ensamblaje o inspección final, cuando el proyecto ya ha invertido tiempo y dinero. Por lo tanto, la solución correcta comienza antes de soldar. Material limpio, protección estable, diseño de junta realista, control de fijación y reglas de inspección claras deben trabajar juntos.
Respuesta rápida: cómo evitar la porosidad en soldadura de aluminio
La forma práctica de reducir la porosidad en soldadura de aluminio es controlar toda la ruta de fabricación. Primero, la superficie de aluminio debe estar libre de aceite, óxido, refrigerante, polvo y humedad. Luego, la junta debe ajustar bien para evitar contaminación atrapada. Después, la soldadura TIG necesita protección estable de argón, acceso adecuado del soplete, manejo limpio del material de aporte y control de entrada de calor.
Para piezas personalizadas, el resultado más sólido proviene de la planificación antes de la producción. Un dibujo debe explicar la función de la pieza, no solo su forma. Si la soldadura debe sellar aire, contener líquido, soportar vibraciones o permanecer visible después del recubrimiento, el plan de calidad debe decirlo claramente.
Por qué la porosidad se convierte en un riesgo real del proyecto
En la mesa de taller, una pieza de aluminio soldada puede verse limpia a primera vista. El cordón puede parecer uniforme, la pieza puede sentirse sólida y la superficie puede parecer lista para el acabado. Sin embargo, bajo una luz más brillante o después de limpiar el pie de soldadura, pueden aparecer pequeños puntos oscuros. En una pieza sellada, esos puntos pueden convertirse luego en burbujas durante una prueba de fugas.
Aquí es donde comienza la presión del proyecto. La pieza ya puede estar mecanizada, cepillada, pintada o preparada para el ensamblaje. Mientras tanto, el equipo de inspección necesita decidir si el problema es cosmético, estructural o funcional. Por lo tanto, el descubrimiento tardío suele ser más costoso que la reparación de la soldadura en sí.
En producción personalizada, el problema rara vez proviene de un solo ajuste de máquina. En cambio, a menudo comienza con aceite de mecanizado dentro de un bolsillo, una superficie húmeda después del almacenamiento, una capa de óxido cerca de la junta o una fijación que cierra un espacio por la fuerza. Como resultado, la calidad de la soldadura debe controlarse desde la preparación del material hasta el envío.
La apariencia superficial importa
Para cubiertas, marcos, carcasas y soportes, los poros pequeños pueden volverse más visibles después del cepillado, pulido, anodizado o recubrimiento en polvo. Por lo tanto, la apariencia debe ser parte del plan de inspección.
El riesgo de fuga importa
Para depósitos, tubos, cajas y ensamblajes relacionados con fluidos, un poro pequeño puede convertirse en una ruta de fuga. Por lo tanto, las pruebas de fugas deben planificarse antes de comenzar el acabado.
El ajuste y la alineación importan
Para marcos soldados o ensamblajes mecanizados, la porosidad a menudo aparece junto con el riesgo de distorsión por calor. Mientras tanto, los agujeros y las caras deben seguir alineándose después de soldar.
Qué ayuda a resolver este artículo
Esta guía está escrita para equipos de ingeniería, abastecimiento y calidad que necesitan piezas de aluminio personalizadas con menos sorpresas. No trata la soldadura como una lección para principiantes. En cambio, explica cómo juzgar el control del proceso, la comunicación con el proveedor, las necesidades de inspección y los detalles de la RFQ antes de que un pedido pase de muestra a producción.
Además, proporciona pasos siguientes claros. Use la categoría Soldadura TIG de Aluminio cuando el proyecto necesite soldaduras de aluminio de precisión. Use las rutas de producto a continuación cuando la pieza se parezca a marcos, placas base o ensamblajes de tuberías. Finalmente, use la ruta de cotización cuando los dibujos y los requisitos de inspección estén listos.
Principales causas de defectos en soldadura de aluminio y soluciones prácticas
La pregunta más útil no es “¿Qué parámetro de soldadura lo arregla todo?” Una mejor pregunta es “¿Dónde pueden entrar gas, suciedad o humedad en el baño de soldadura?” Una vez que esa ruta está clara, el método de prevención se vuelve más práctico.
Por ejemplo, el refrigerante CNC puede permanecer en agujeros perforados. La tinta de marcador puede permanecer cerca de una línea de soldadura. Además, un espacio en la junta puede atrapar polvo de óxido o residuos de limpieza. Por lo tanto, el plan de calidad debe centrarse en cada paso que toca la zona de soldadura.
| Fuente de riesgo | Cómo se siente en producción | Mejor método de control | Detalle de RFQ que ayuda |
|---|---|---|---|
| Aceite, refrigerante o fluido de corte | Aparecen pequeños poros cerca de ranuras mecanizadas, agujeros perforados y esquinas internas. | Limpiar antes del ajuste y revisar bolsillos ocultos antes del punteado. | Indicar si las piezas se mecanizan antes de soldar. |
| Óxido y película superficial | El cordón comienza opaco, rugoso o inconsistente incluso cuando la pieza se ve limpia. | Usar herramientas de limpieza solo para aluminio y limpiar cerca del momento de soldar. | Listar el grado del material, la condición superficial y las necesidades de acabado. |
| Humedad del almacenamiento | La porosidad aparece aleatoriamente en piezas similares. | Mantener el material y el material de aporte secos, luego controlar el tiempo de manipulación después de la limpieza. | Explicar la condición de almacenamiento si se usa material suministrado. |
| Protección de argón inestable | La soldadura muestra hollín, color opaco o forma de cordón inestable. | Proteger la zona de soldadura de corrientes de aire y verificar el acceso del soplete. | Proporcionar archivos 3D o fotos que muestren esquinas estrechas. |
| Mal ajuste de la junta | Los poros se acumulan cerca de espacios, soldaduras de punteo o bordes desiguales. | Usar fijaciones adecuadas, secuencia de punteo y preparación de bordes. | Marcar dimensiones críticas después de soldar. |
| Inspección tardía | Los defectos aparecen después del recubrimiento, mecanizado o ensamblaje. | Inspeccionar antes del acabado y agregar pruebas de fugas cuando sea necesario. | Definir controles visuales, dimensionales y funcionales. |
Para conceptos básicos del proceso, Lincoln Electric explica conceptos de TIG en aluminio como operación en CA y protección de argón en su Guía para soldadura TIG de aluminio. Además, Miller analiza el control de calor y el comportamiento del baño en su guía para principiantes de TIG en aluminio. Sin embargo, un proveedor de producción aún necesita control real en el taller, no solo teoría correcta.
 Ver producto
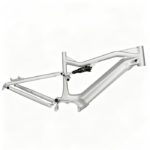
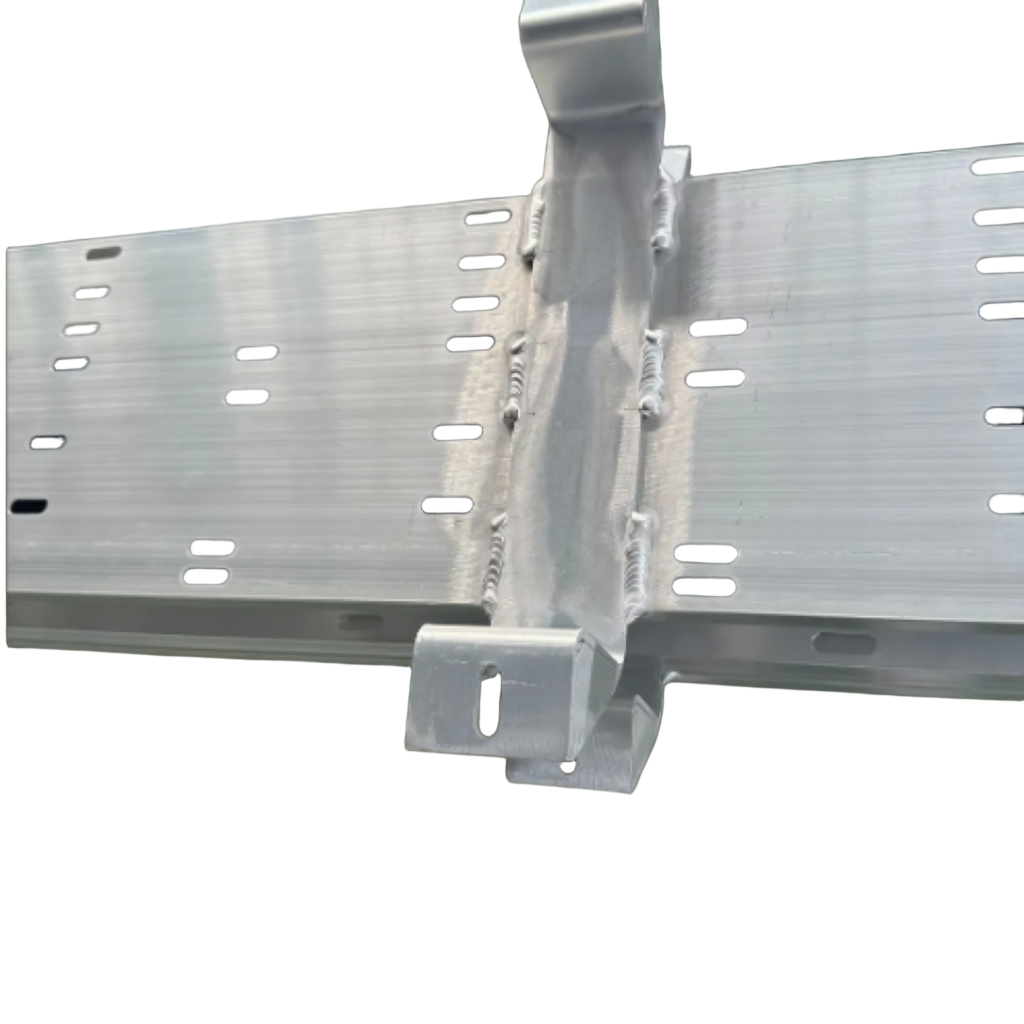
Marco de aluminio soldado: soldaduras limpias y geometría estable
Un marco de aluminio soldado es un buen ejemplo de por qué el control de porosidad y el control dimensional deben trabajar juntos. Las soldaduras se ubican cerca de esquinas, ranuras y áreas planas largas. Mientras tanto, el calor puede sacar la estructura de escuadra.
Por lo tanto, el marco debe revisarse para acceso de limpieza, soporte de fijación, secuencia de soldadura y medición final. Si el marco soporta equipos o experimenta vibraciones, la inspección debe planificarse antes del trabajo por lotes.
Ver marco de aluminio soldadoCómo elegir la ruta de proceso correcta antes de cotizar
Una pieza de aluminio personalizada puede necesitar soldadura, mecanizado CNC, doblado, estampado, acabado superficial e inspección. Sin embargo, estos pasos no deben planificarse por separado. La secuencia afecta la limpieza, la distorsión, el costo y la calidad final.
.
Por ejemplo, mecanizar antes de soldar puede mejorar el ajuste de la junta. Sin embargo, también puede dejar aceite dentro de agujeros o cavidades. Por otro lado, soldar antes del mecanizado final puede ayudar a controlar las caras críticas después del movimiento por calor. Por lo tanto, la ruta del proceso debe seguir la función de la pieza terminada.
.
| Situación de la pieza |
Preocupación principal |
Ruta recomendada |
Página siguiente para ver |
|---|---|---|---|
| Marco o estructura de soporte |
Porosidad, escuadra, apariencia del cordón y resistencia a la vibración. . |
Cortar, limpiar, fijar, puntear, soldar en secuencia equilibrada, luego medir. . |
Marco de aluminio soldado |
| Ensamblaje de tubería o tubo |
Precisión de recorte, redondez, residuos internos, acceso de protección y fugas. . |
Doblar, recortar, limpiar bordes internos, fijar, soldar, luego probar si está sellado. . |
Fabricación de tubería de aluminio |
| Ensamblaje de placa base |
Planitud, posición de agujeros, calidad del pie de soldadura y estabilidad de montaje. . |
Preparar placa y poste, fijar firmemente, soldar con calor equilibrado, luego inspeccionar. . |
Placa base de aluminio |
| Pieza mecanizada soldada |
Residuos de refrigerante, desplazamiento de referencia y tolerancia final después de soldar. . |
Mecanizado en bruto, limpiar, soldar, luego mecanizar superficies críticas al final. . |
Revisión de mecanizado CNC + soldadura |
 Ver producto
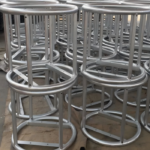
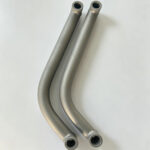
Fabricación de tubería de aluminio: el residuo oculto es el detalle a vigilar
Los ensamblajes de tubería y tubo crean un tipo diferente de riesgo. El exterior puede verse limpio, mientras que el borde interior aún lleva residuos de corte o humedad. Además, los tubos doblados necesitan recorte y alineación estables antes de soldar.
.
Por lo tanto, los proyectos de tubería deben definir la limpieza interna, la calidad del recorte, la posición de fijación, el acceso de soldadura y los requisitos de prueba de fugas desde el principio.
.
Lista de verificación de control de calidad para piezas de soldadura de aluminio
Un plan de inspección confiable debe sentirse práctico. No solo debe decir “verificar calidad”. En cambio, debe indicar al equipo qué verificar antes de soldar, durante la soldadura y después de soldar. Esto facilita detectar defectos de soldadura temprano.
.
En un taller real, un buen control deja pistas visibles. El cepillo solo para aluminio está separado. El alambre de aporte está protegido. Las piezas no se apilan con superficies aceitosas tocando las áreas de soldadura. Además, la fijación sostiene la pieza firmemente sin ocultar la junta de la limpieza.
.
Flujo de inspección paso a paso
- Revisar el dibujo y la función.
. Primero, confirmar si la soldadura es cosmética, estructural, sellada o cercana a una referencia crítica.
. - Confirmar la condición del material.
. Luego, verificar la aleación, el espesor, el acabado superficial y la condición de almacenamiento antes de limpiar.
. - Limpiar la zona de soldadura.
. Después, eliminar aceite, refrigerante, óxido, humedad, tinta, polvo y partículas sueltas.
. - Verificar el ajuste y el contacto de fijación.
. También, asegurarse de que la pieza no esté forzada en posición de una manera que cree espacios ocultos.
. - Proteger la protección de argón.
. Luego de eso, verificar el acceso del soplete, el espacio libre de la copa y las posibles corrientes de aire alrededor del área de soldadura.
. - Inspeccionar la soldadura visualmente.
. Buscar poros superficiales, grietas, hollín, socavación, falta de fusión y forma irregular del cordón.
. - Medir dimensiones críticas.
. Mientras tanto, verificar agujeros, planitud, ángulos, escuadra y caras de montaje después del movimiento por calor.
. - Agregar pruebas funcionales cuando sea necesario.
. Finalmente, usar pruebas de fugas cuando la pieza deba contener aire, refrigerante, agua u otros fluidos.
.
No todas las piezas necesitan el mismo nivel de inspección. Sin embargo, cada pedido debe definir qué significa “aceptable”. Para productos visibles, la superficie de soldadura puede ser la principal preocupación. Para productos sellados, el rendimiento de fugas importa más. Para marcos, la alineación y la resistencia pueden ser lo más importante.
.
Módulo simple de decisión de compra
Antes de aprobar un proveedor o muestra, use esta lógica de decisión. Convierte un problema técnico de soldadura en una ruta de compra más clara.
.
Avanzar cuando:
- El dibujo muestra la ubicación de la soldadura y las dimensiones críticas.
. - El proveedor explica los pasos de limpieza, fijación, soldadura e inspección.
. - La muestra coincide con la superficie, el ajuste y la función requeridos.
. - La cotización incluye la ruta de proceso correcta, no solo un precio bajo de soldadura.
.
Hacer más preguntas cuando:
- La pieza debe sellar, pero no se discute una prueba de fugas.
. - La soldadura es visible, pero los requisitos de acabado no están claros.
. - La pieza tiene agujeros o caras ajustados, pero no se revisa el orden del proceso.
. - El proveedor solo habla de parámetros e ignora la limpieza o el control de fijación.
.
 Ver producto
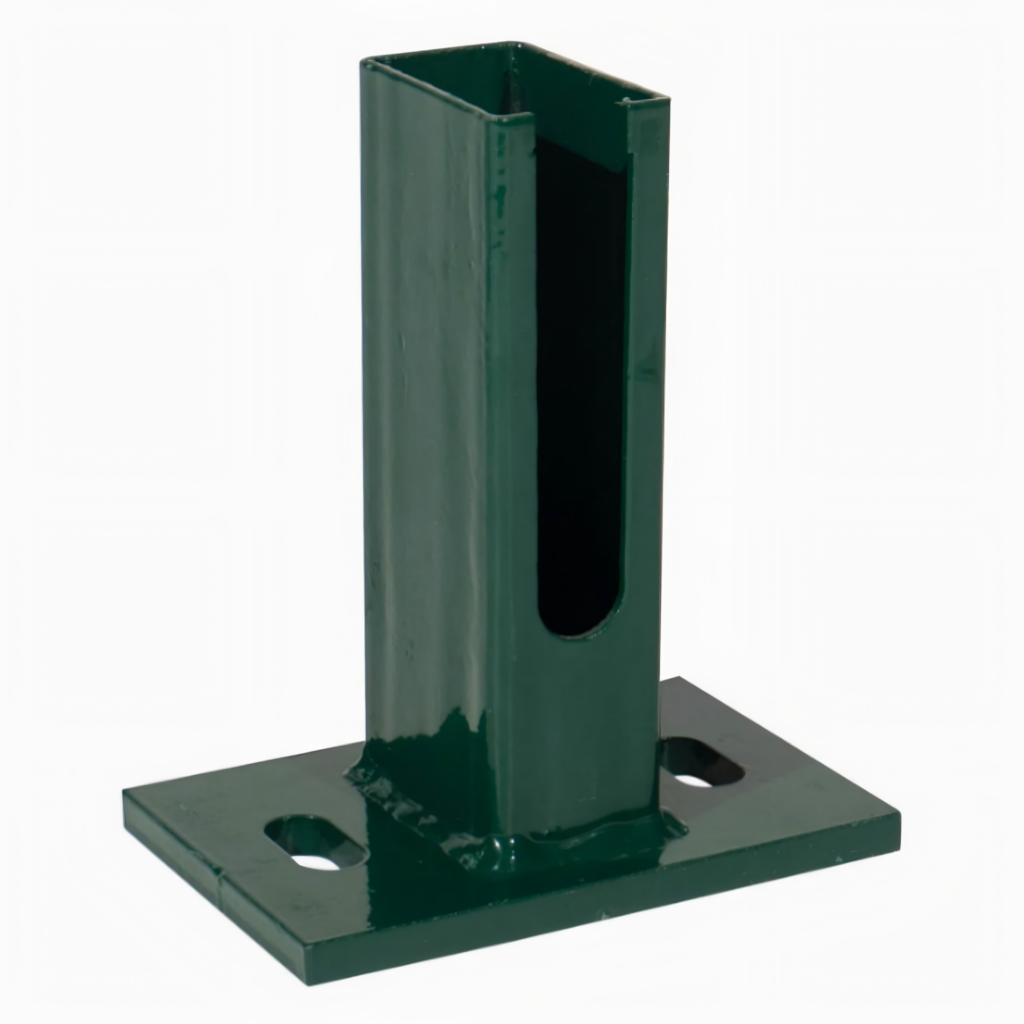
Placa base de aluminio: la calidad de soldadura, la planitud y los agujeros deben coincidir
Una placa base es fácil de subestimar. La soldadura puede verse fuerte, pero el calor aún puede afectar la planitud y la alineación de los agujeros de montaje. Mientras tanto, los poros superficiales cerca del poste pueden reducir la confianza durante la inspección.
.
Por esta razón, los proyectos de placa base deben conectar la limpieza de soldadura, la presión de fijación, la posición de agujeros y los requisitos de superficie final antes de la producción.
.
Cómo Flow Wing Metal apoya desde prototipo hasta producción
Flow Wing Metal trabaja en torno a soldadura de metales de precisión personalizada, mecanizado CNC, doblado de tubería, estampado y fabricación relacionada. Por lo tanto, los proyectos de aluminio soldado pueden revisarse como piezas completas en lugar de cordones de soldadura aislados.
.
Esto importa porque muchos problemas ocurren entre procesos. Por ejemplo, una cavidad CNC puede contener refrigerante. Un borde estampado puede llevar rebabas. Un tubo doblado puede recuperarse ligeramente. Un marco soldado puede moverse durante el enfriamiento. Como resultado, la ruta del proceso debe conectar la preparación, la soldadura, la inspección y el acabado.
.
Encontrar riesgo antes del trabajo por lotes
Un prototipo debe hacer más que probar la forma. Debe mostrar si el acceso de limpieza, el acceso de soldadura, el soporte de fijación, el control de distorsión y el momento de inspección son realistas.
.
Además, la retroalimentación de la muestra puede revelar dónde es probable que aparezca la porosidad. Esas áreas pueden entonces recibir mejor preparación de bordes o inspección adicional.
.
Mantener la calidad repetible
Durante la producción, el objetivo cambia de una buena muestra a una calidad repetible. Por lo tanto, la secuencia de limpieza, la posición de punteado, la secuencia de soldadura, el uso de fijación y las comprobaciones finales necesitan consistencia.
.
Mientras tanto, la comunicación debe mantenerse clara. Los dibujos, fotos, notas de inspección y detalles de embalaje deben coincidir con la muestra aprobada.
Información de RFQ que ayuda a prevenir la porosidad en la soldadura
Un RFQ sólido le da a la fábrica suficiente contexto para prevenir defectos de soldadura antes de que ocurran. Sin información clara, un presupuesto puede cubrir solo el tiempo de soldadura. Sin embargo, el proyecto real también puede necesitar limpieza, diseño de accesorios, mecanizado post-soldadura, pruebas de fugas y embalaje cuidadoso.
.
Por lo tanto, el RFQ debe incluir tanto datos técnicos como condiciones de uso. Esto hace que el presupuesto sea más preciso y reduce el ir y venir posterior.
.
Envíe estos archivos técnicos
- Planos 2D y archivos 3D cuando estén disponibles.
. - Grado de aluminio, temple, espesor, tamaño de tubo o tamaño de chapa.
. - Ubicación de la soldadura, longitud de la soldadura, áreas visibles y superficies críticas.
. - Requisitos de tolerancia después de la soldadura, no solo antes de la soldadura.
. - Cantidad de prototipos, cantidad piloto y volumen de producción esperado.
.
Explique estas necesidades de uso real
- Si la pieza soporta carga, vibración, calor, líquido o presión.
. - Si la soldadura debe permanecer visible después del acabado.
. - Si se requieren pruebas de fugas o informes dimensionales.
. - Si el tratamiento de superficie incluye cepillado, pulido, anodizado o recubrimiento.
. - Si se necesita embalaje especial para proteger las superficies acabadas.
.
Cómo inspeccionar las piezas después de recibirlas
El control de porosidad continúa después de la entrega. La inspección de recepción no necesita ser complicada para cada pedido. Sin embargo, el equipo debe verificar las cosas correctas antes de que las piezas pasen al ensamblaje o recubrimiento.
.
Primero, inspeccione las soldaduras bajo luz constante. Luego, gire la pieza y mire a lo largo del pie de la soldadura. Después, limpie el área de soldadura con un paño limpio para revelar poros oscuros, hollín o residuos. Para ensamblajes sellados, la apariencia por sí sola no es suficiente, por lo que las pruebas de fugas deben seguir el método acordado.
.
Mire antes del recubrimiento
Verifique la superficie de soldadura antes de cepillar, anodizar, recubrir con polvo o pintar. Después del acabado, los poros pequeños pueden volverse más difíciles de reparar limpiamente.
.
Medir después de soldar
Verifique agujeros, planitud, ángulos y caras de montaje después de la soldadura. El movimiento por calor puede afectar el ajuste incluso cuando la soldadura en sí se ve limpia.
.
Pruebe piezas selladas
Use pruebas de fugas cuando la pieza deba contener aire, agua, refrigerante o fluido. Esto evita encontrar un pequeño defecto después de la instalación.
.
Lectura extendida y rutas de servicio
Estas páginas ayudan a pasar de la investigación del problema al siguiente paso práctico. Están colocadas aquí para guiar la ruta del proyecto de forma natural, no para distraer del artículo.
.
Soldadura TIG de aluminio Use esta página cuando el proyecto necesite control de precisión en soldadura TIG de aluminio.
. Proceso relacionado
Servicios de mecanizado CNC Útil cuando las piezas soldadas también necesitan agujeros, caras de referencia o tolerancias ajustadas.
. Ruta de cotización
Contacto / Presupuesto Envíe planos, material, cantidad, tolerancia, acabado y detalles de aplicación.
.
Preguntas frecuentes
¿Qué causa la porosidad en la soldadura de aluminio en piezas personalizadas?
Las causas comunes incluyen aceite, óxido, humedad, refrigerante de mecanizado, alambre de aporte sucio, blindaje de argón inestable, mal ajuste de la junta y soldadura retrasada después de la limpieza. En producción, varias causas pequeñas a menudo aparecen juntas, por lo que se debe revisar toda la ruta.
.
¿Cómo se pueden limpiar las piezas de aluminio antes de soldar?
La zona de soldadura debe estar libre de grasa, refrigerante, tinta de marcador, óxido, polvo y humedad. Además, se deben usar herramientas solo de aluminio para evitar la contaminación cruzada. La limpieza debe realizarse lo suficientemente cerca del momento de la soldadura para que la superficie no se ensucie nuevamente.
.
¿Qué controles de calidad se deben solicitar para piezas de soldadura de aluminio?
Como mínimo, la inspección visual de la soldadura y las comprobaciones dimensionales deben coincidir con la función de la pieza. Para piezas selladas, se deben agregar pruebas de fugas. Para marcos y ensamblajes mecanizados, también se deben verificar la planitud, la escuadra, la posición de los agujeros y las caras críticas después de la soldadura.
.
¿Puede un solo proveedor manejar soldadura, mecanizado CNC, doblado y estampado?
Sí. Flow Wing Metal admite soldadura de metales personalizada y servicios de fabricación relacionados, incluyendo soldadura TIG de aluminio, mecanizado CNC, doblado de tubos y estampado de metales. Esto es útil cuando una pieza necesita uniones soldadas más características mecanizadas, dobladas o formadas.
.
¿Cuándo se deben agregar pruebas de fugas?
Se deben agregar pruebas de fugas cuando la pieza deba contener aire, agua, refrigerante, aceite u otro fluido. También se debe considerar para cajas, tubos, depósitos y recintos donde un pequeño poro podría convertirse en una falla funcional.
.
¿Cómo solicito un presupuesto de Flow Wing Metal?
Prepare planos, grado de material, cantidad, tolerancia, acabado superficial y requisitos de aplicación. Luego envíe la información a través de la página de Contacto / Presupuesto. Si la pieza tiene áreas selladas o dimensiones críticas, incluya esos requisitos en el mensaje.
.
Recomendación final: controle el proceso antes de que aparezca el defecto
La porosidad es más fácil de prevenir que de reparar. Un plan sólido comienza con información limpia en el RFQ, diseño de junta realista, fijación estable, preparación de soldadura limpia, blindaje de argón protegido e inspección que coincida con el uso real de la pieza.
.
Para piezas de aluminio personalizadas, el mejor resultado no es solo un cordón de aspecto limpio. La pieza debe ajustarse, sellar, soportar su carga, aceptar el acabado y mantenerse consistente desde la muestra hasta la producción en lote. Por lo tanto, el siguiente paso debe ser una revisión de fabricación basada en planos y requisitos de aplicación.
.
- Primero:
prepare planos, grado de material, cantidad, tolerancia, acabado superficial y notas de aplicación.
. - Segundo:
marque soldaduras críticas, áreas selladas, superficies visibles y dimensiones post-soldadura.
. - Tercero:
solicite una ruta de proceso que cubra limpieza, control de fijación, soldadura, inspección y acabado.
.